

How To Take An Animation In After Effects And Make It A Mov
Create your ain animations with this quick tutorial: you'll learn how to combine gratuitous characters from Reallusion with alive-activity stock video from Envato Elements using Adobe Afterwards Effects. We'll show step-by-step how to download and add the free 2D drawing animations to a live action video, in about 30 minutes get-go to finish.
To gloat the launch of Drawing Animator 4.5, Reallusion is offering a 50%-off Cartoon Animator coupon code for Envato Tuts+ readers, plus 12 free characters, and more complimentary resources. Cartoon Animator is non required for this tutorial.
What You lot'll Larn in This Tutorial
You volition learn:
- How to import a 2D cartoon grapheme into Adobe Later Effects
- How to add together the cartoon grapheme into your scene
- How to combine 2D drawing characters with live action footage
What You'll Demand
To follow along with this tutorial you will need your own version of Adobe After Effects and an online account with Reallusion. To get a member simply head over to the Reallusion website and create an account.
You will likewise demand a live action video for the groundwork footage of your animation. For this tutorial we will be using the footage below from Envato Elements, the artistic stock subscription service, and disco lights from Pixabay. Click on the links below to download:
- Music Band Performing at Recording Studio
- Disco Lights Background Loop
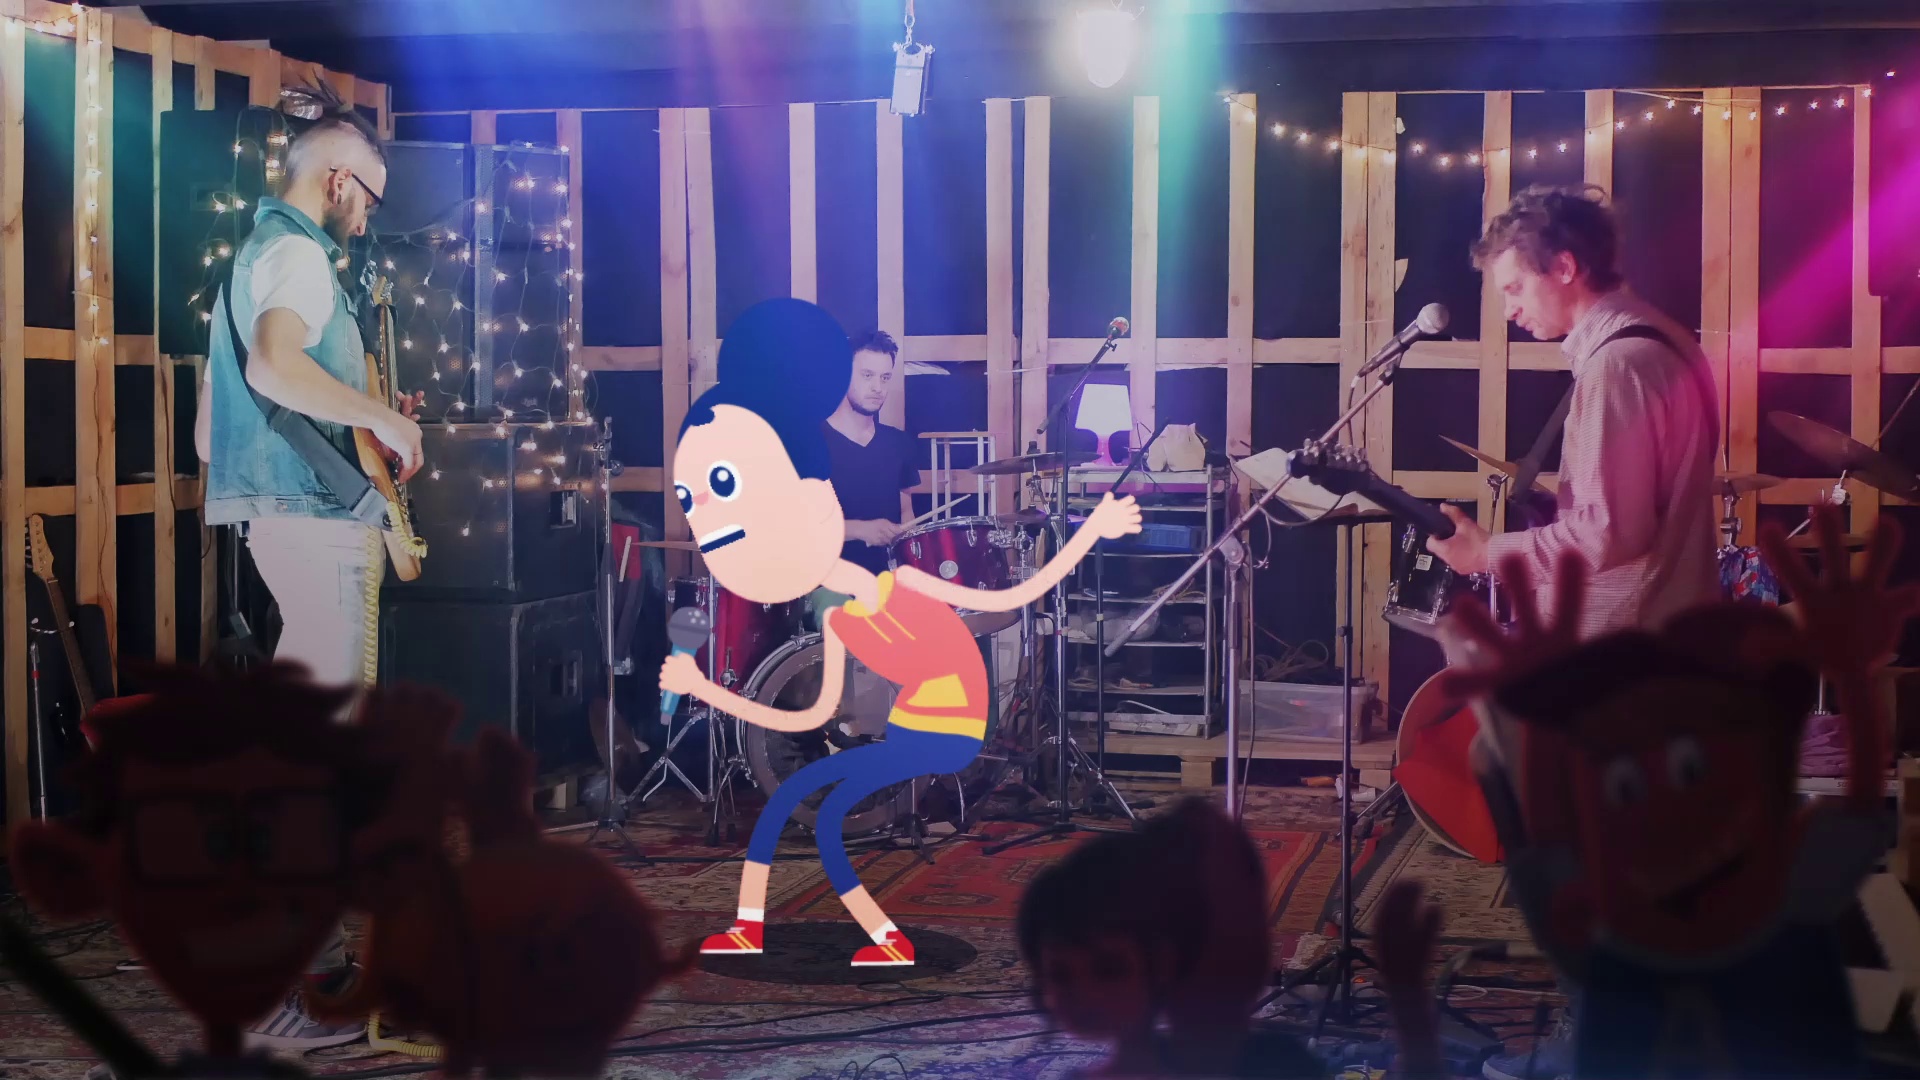
- An animated character singing or dancing: we've used the G3 Vector Buddies graphic symbol "Vanessa" from Reallusion


1. Download Gratis Animations From Reallusion
Footstep one
To download your free animations, starting time head over to the Cartoon Animator free assets page on the Reallusion website and follow the instructions to create an account. You will not need Cartoon Animator to follow this tutorial, but encounter run across our contempo free tutorial series near character blitheness with Cartoon Animator if you want to learn more:
Stride 2
Click on the Sign up to Download push on the Reallusion website to access the free, transparent animated videos.


Step three
Cull from the gratuitous animations available and download the ones that you want to use for the project. For this example we will exist using the singing grapheme. Make sure to too use the l%-off coupon code to purchase the software and content resources if you lot want to endeavour out Cartoon Animator 4!
2. How to Import Animations Into After Effects
Step 1
At present that you lot have downloaded your new animations, take a moment to expect through each of the dissimilar characters, effects and backgrounds that are available for you to use.
One time you have chosen which characters you lot would like to use for your scene, it is fourth dimension to take it into Adobe After Furnishings where we tin merge our drawing characters with a live action video.
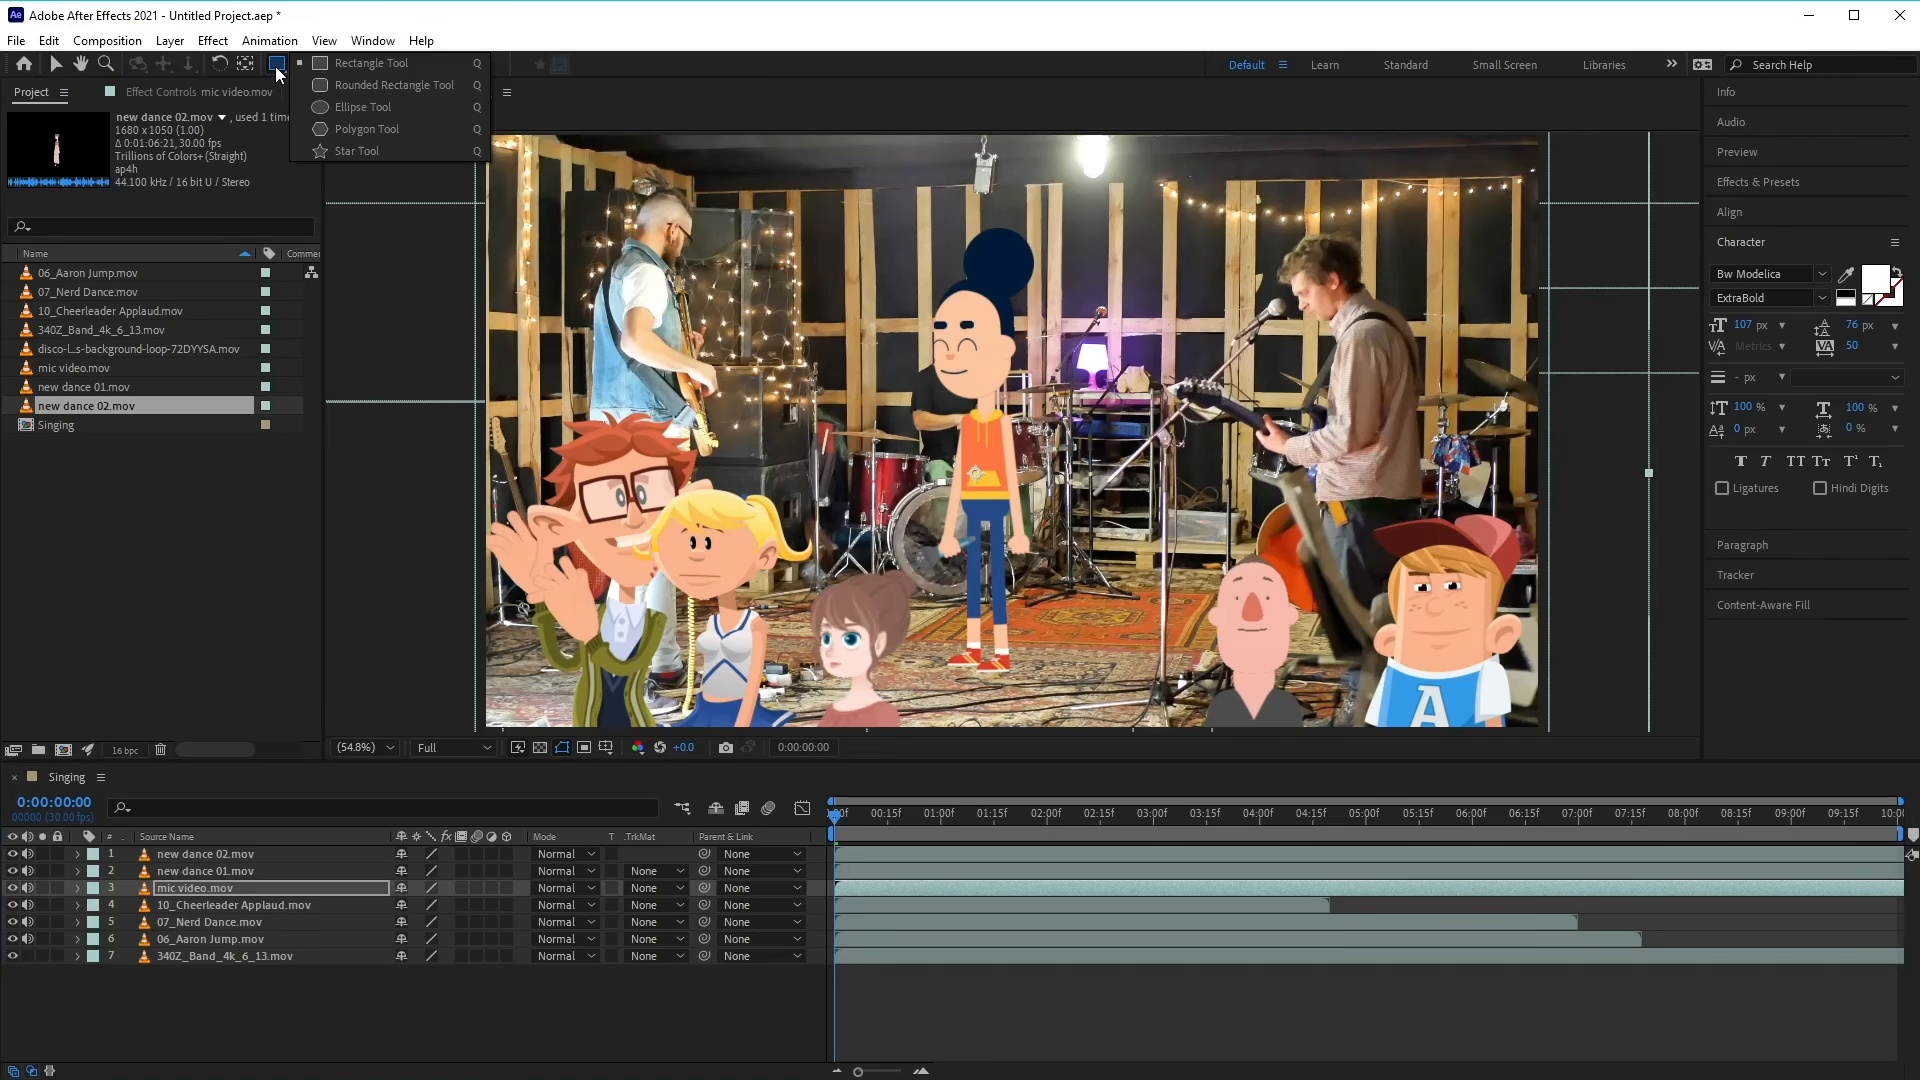
In Adobe Afterward Effects, import the character videos by going to File > Import > Fileand selecting the .MOV video file.


Step 2
When importing the file this will prompt a new window where you must make up one's mind how y'all wish to translate the alpha channel. Select Straight - Unmatted and click OK.


Step 3
Once you have imported the cartoon graphic symbol video, you will find it located in the Project Panelwhich is usually located on the left side of the screen. Repeat this process for any other character animations you lot would like to use. For this tutorial we take included the following gratis animations:
- 06_Aaron Jump.mov
- 07_Nerd Dance.mov


Step 4
Import the live action video files you lot downloaded from Envato Elements by going to File > Import > Fileand selecting the video files. These will include the live ring video and the disco lights.
You will too find both video files in the Project Panel.


3. Compose the Scene
Step 1
Create a new composition by going toComposition > New Composition (Control - N).


Footstep 2
In the limerick settings, use the following:
- Composition Name: Rock Band
- Width:1920 px
- Height:1080 px
- Frame Rate: 30
For theElapsing,this tin can be changed to arrange the length of your cartoon animation and alive action video file.


Step 3
Use the mouse to drag and drop the video listed below into the limerick. This volition human action as the background for the blitheness.
- 340Z_Band_4k_6_13.mov


Step four
At present drag and driblet the characters that you wish to use for your animation into the scene. Make sure that you layer the videos correctly. In order to make the characters announced in the video information technology needs to be layered on top of the live activeness video.


Step 5
Select the cartoon characters and employ the Transformoptions to resize and reposition them so that they are scaled accordingly compared to the residuum of the scene in the live activeness footage.
You may also need to re-scale the band footage as well so that it fits the size of the composition.


Step 6
To basis the vocalizer into the scene nosotros need to identify a shadow underneath her. To do this select the Ellipse Tool (Q)and use information technology to create a shape layer by clicking and dragging in the scene (make sure that you have not selected whatever layers whilst doing this).


Footstep seven
Make the color of the ellipse black and remove any outlines if necessary.


Stride viii
Open up theTransformoptions and reduce theOpacityto 50% and then make sure to place the shape layer below the character layer. You will also need to reposition the ellipse so that it appears under her feet.


Step nine
Give your scene a sense of depth by adding some effects to your foreground characters. Add together the following effects to your foreground characters:
- Brightness & Contrast: Brightness - 138
- Gaussian Blur: Blurriness 17


four. How to Add Disco Lights
Step 1
Use the mouse to drag and drop the disco lights video into the composition and make certain that it is placed above the rest of the layers.


Step two
UnderMode, click on the dropdown menu and select Screen.


Footstep three
Employ the transform options to scale the lights so that they fit the scene better. In this example we have scaled them up to 140% and repositioned them slightly higher. Too lower the opacity to 85% to arrive blend into the scene.


5. Final Adjustment Layers
There area a couple of last changes to make to get everything looking merely right.
Colour and Contrast Correction Curve
To add together a colour correction curve, select Effects > Colour Correction > Curves and plot an S-shaped curve on the graph to increase contrast. You tin also use individual scarlet, green, and blue channels to control colour.


Separation Layer
To requite the animation a little bit of accent, the last thing we'll do is dim the live-action video slightly by calculation a blackness solid layer. Head up to Layer > New > Solid with black selected, and then set up the opacity of the solid black afterwards to xx%. Place the layer below the animation and above the live-action video.


Awesome! You're Finished!
Congratulations! And that'due south how you tin can download free Animations and add them into live action video using Adobe After Effects. Feel free to use multiple characters or your own designs and footage to create your ain video combinations.
In the meantime, I hope you've found this tutorial useful and I'll run into you next time, on Envato Tuts+!


Source: https://photography.tutsplus.com/tutorials/how-to-add-free-animations-live-action-after-effects--cms-38468
Posted by: campbellhadeare.blogspot.com
0 Response to "How To Take An Animation In After Effects And Make It A Mov"
Post a Comment